
- Launch the Visual Studio 2022 IDE.
- Click on “Create new project.”
- In the “Create new project” window, select “ASP.NET Core Web API” from the list of templates displayed.
- Click Next.
- In the “Configure your new project” window, specify the name and location for the new project. Optionally check the “Place solution and project in the same directory” check box, depending on your preferences.
- Click Next.
- In the “Additional Information” window shown next, select “.NET 9.0 (Standard Term Support)” as the framework version and uncheck the check box that says “Use controllers,” as we’ll be using minimal APIs in this project.
- Elsewhere in the “Additional Information” window, leave the “Authentication Type” set to “None” (the default) and make sure the check boxes “Enable Open API Support,” “Configure for HTTPS,” and “Enable Docker” remain unchecked. We won’t be using any of those features here.
- Click Create.
We’ll use this ASP.NET Core Web API project to work with the code examples given in the sections below.
IFormFile and IFormFileCollection in ASP.NET Core
In the recent versions of ASP.NET Core, minimal APIs provide support for uploading files using the IFormFile and IFormFileCollection interfaces. While IFormFile is used to upload a single file, IFormFileCollection is used to upload multiple files. The following code snippet illustrates how you can upload a single file using IFormFile in your minimal API application.
app.MapPost("/upload", async (IFormFile file) =>
{
    var tempFile = Path.GetTempFileName();
    using var fileStream = File.OpenWrite(tempFile);
    await file.CopyToAsync(fileStream);
});
Note that the File.OpenWrite method accepts the path to a file in your file system as a parameter and returns a FileStream instance. As its name indicates, a FileStream object provides a Stream for a file, meaning a sequence of bytes.
Similarly, the following piece of code shows how you can upload multiple files using the IFormFileCollection interface.
app.MapPost("/upload_multiple_files", async (IFormFileCollection files) =>
{
    foreach (var file in files)
    {
        var tempFile = Path.GetTempFileName();
        using var fileStream = File.OpenWrite(tempFile);
        await file.CopyToAsync(fileStream);
    }
});
Often we will want to do more with a file than simply upload it. If we want to parse or manipulate the contents of a file [OK?], we can take advantage of the StreamReader class. StreamReader is a high-level class, built on top of FileStream, that allows us to read the characters from a byte stream. StreamReader can also handle character encoding (UTF-8, ASCII, etc.) if needed.
Let’s say you have a file that contains author records that you want to insert into a database table. Assuming each line of text in the file represents a different author record, you could include the following code in your Program.cs file to upload the contents of the file, line by line, to a minimal API endpoint.
app.MapPost("/author/upload", (IFormFile file,
    [FromServices] IAuthorRepository authorRepository) =>
{
    using var streamReader = new StreamReader(file.OpenReadStream());
    while (streamReader.Peek() >= 0)
        authorRepository.Create(streamReader.ReadLine() ?? string.Empty);
});
You might use the preceding code snippet to read a collection of author data represented as JSON, for example, and then insert those records in a database table. Note that I have omitted the source code of the IAuthorRepository interface and its implemented classes here for brevity.
Avoiding anti-forgery errors when uploading files
When uploading files in ASP.NET Core, you may often encounter anti-forgery errors. ASP.NET Core issues these errors to warn of cross-site request forgery attacks.
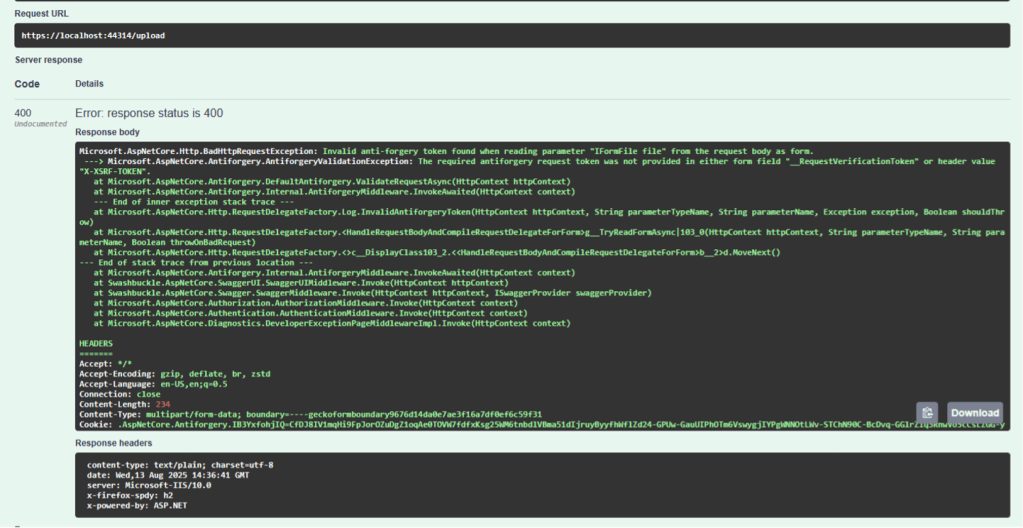
Figure 1: ASP.NET Core may generate an anti-forgery error when uploading a file.
Foundry
If your endpoint is safe and it doesn’t require anti-forgery protection, you can disable anti-forgery validation for the endpoint by using the DisableAntiforgery method, as shown in the following code.

